Highlights - Odoo Advance Email Configurator App
- Odoo Advance Email Configurator helps to auto-configure the incoming and outgoing mail servers directly from the preferences.
- It makes it convenient to use both the mail server parameters in one category.
- Odoo Email Configurator also allows to fetch new emails (using IMAP) received from the last time they were downloaded and successfully processed, in addition to ‘unread’ status.
- In case of errors found during the processing of an email, Odoo will re-attempt to fetch the emails from the last date and time they were successfully received and processed.
- With this easy to use functionality, you will be able to save your precious time and quickly can access the mail servers.
- Odoo Email Configurator Module provides the functionality of prioritizing the mail server self configured by the user. However, if the mail server of user is not available then it will by default prioritize the existing mail servers.
Glimpse Of Odoo Email Configuration Solution
How to Install App
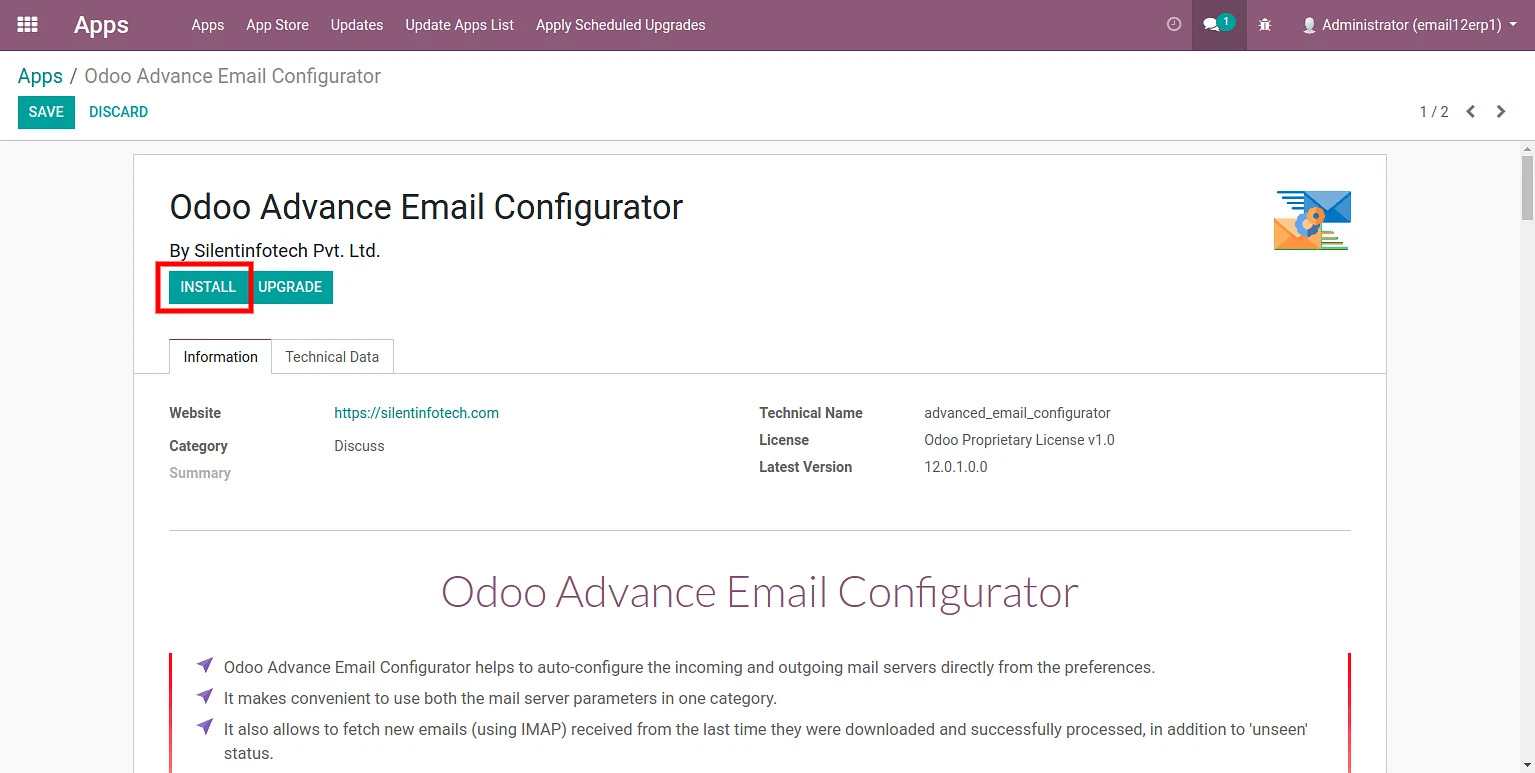
- For Installation – Go to apps -> Search ‘odoo advance email configurator’ -> Install.
How to Use Odoo Email Configurator Module?
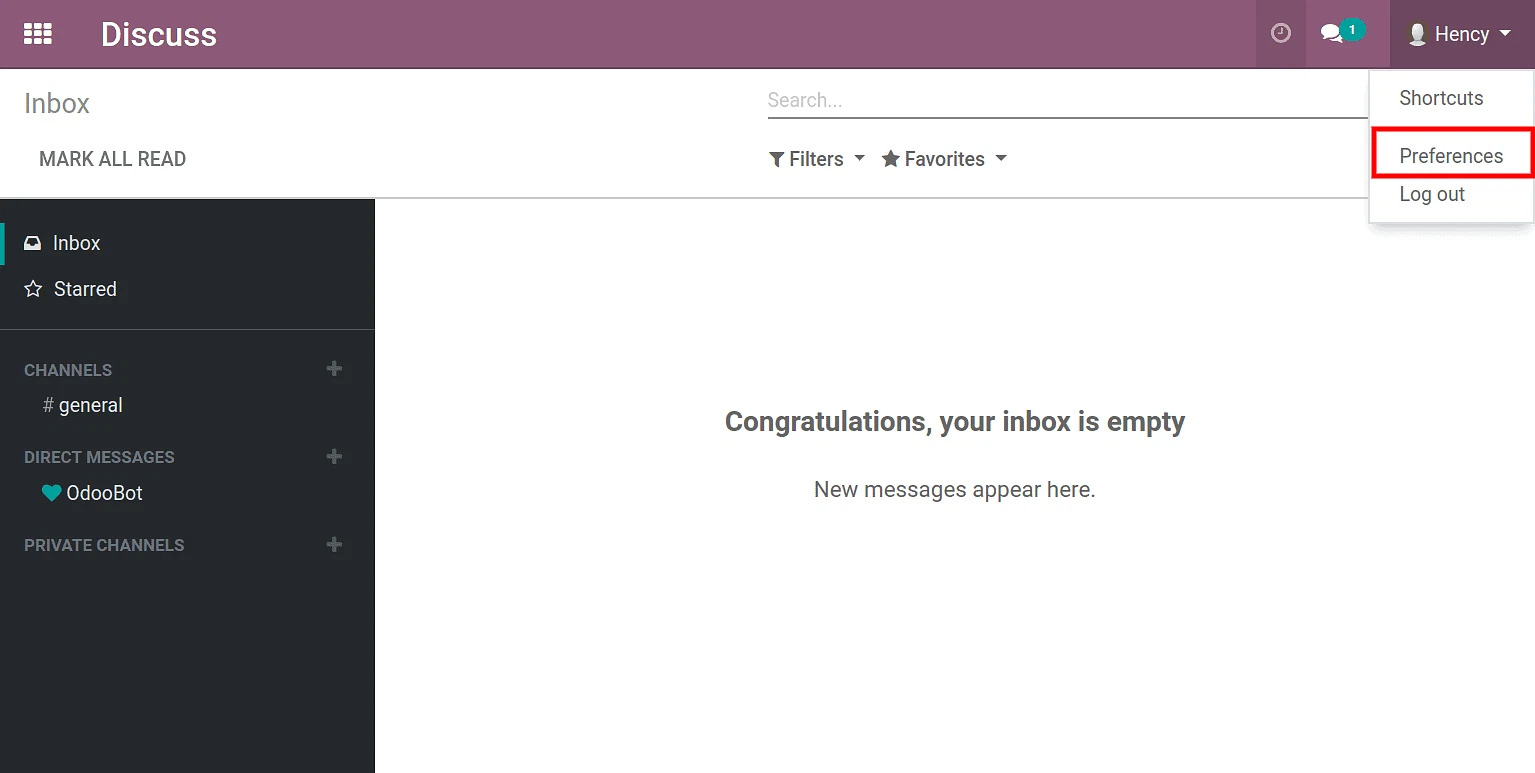
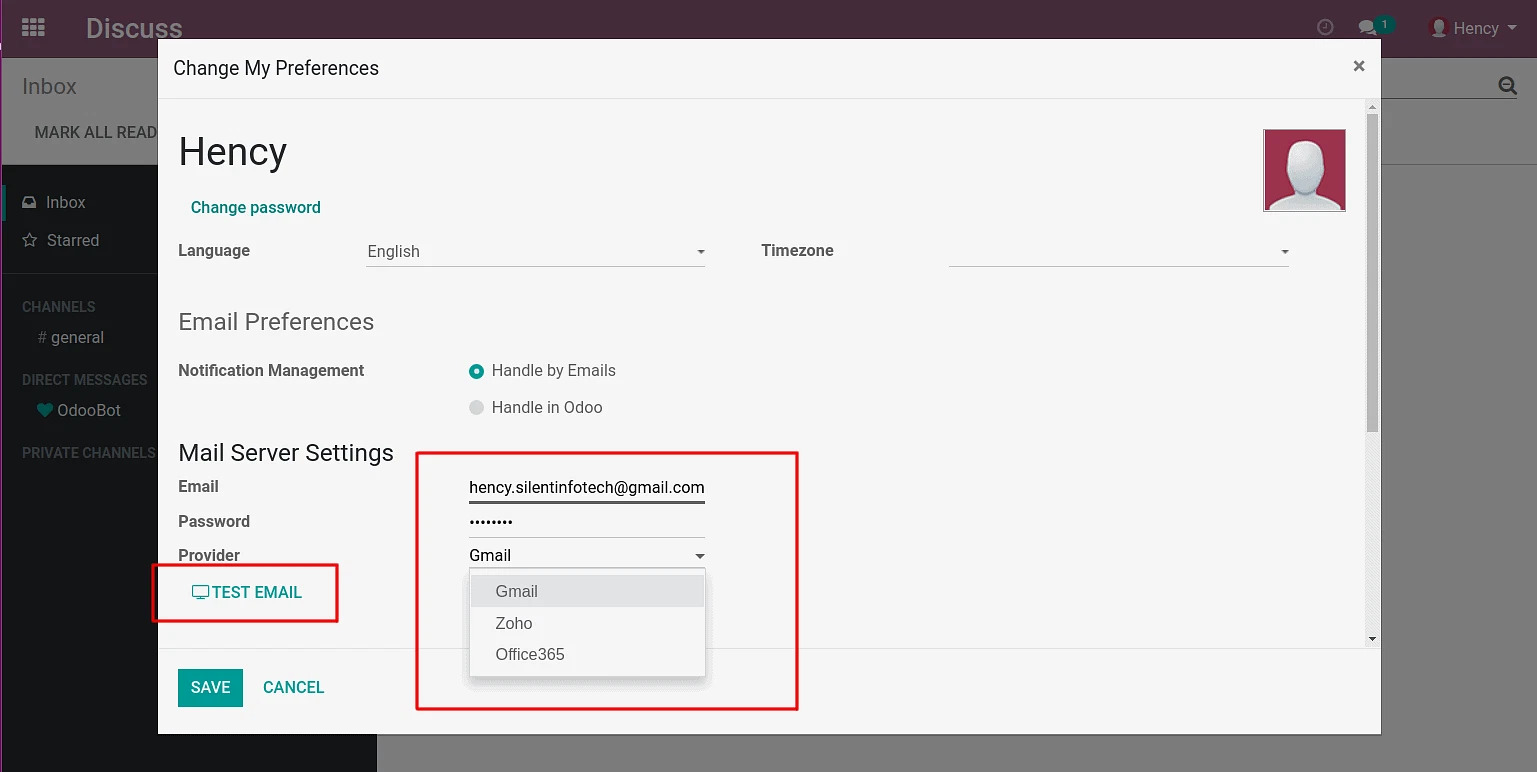
After Installation – Go to settings -> (Username) -> Preferences.
The provider can be directly selected from the preferences.
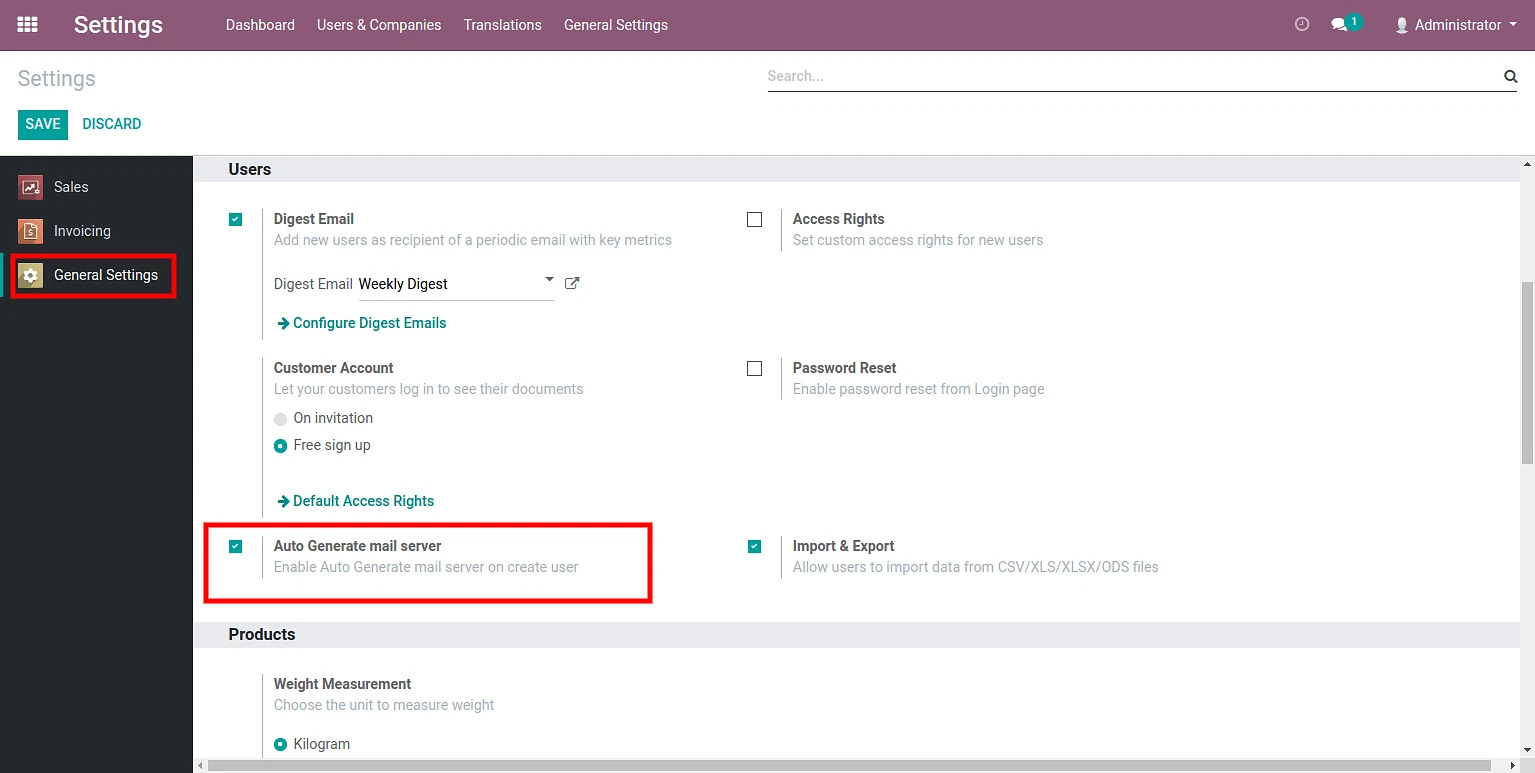
Auto Generate
- Go to settings -> General settings -> Auto generate ( tick ).
- If auto-generate is selected, then when the user is created, it will automatically configure Incoming and outgoing mail server.
- When the Auto-generate is not selected, then the user can configure the servers from preferences.
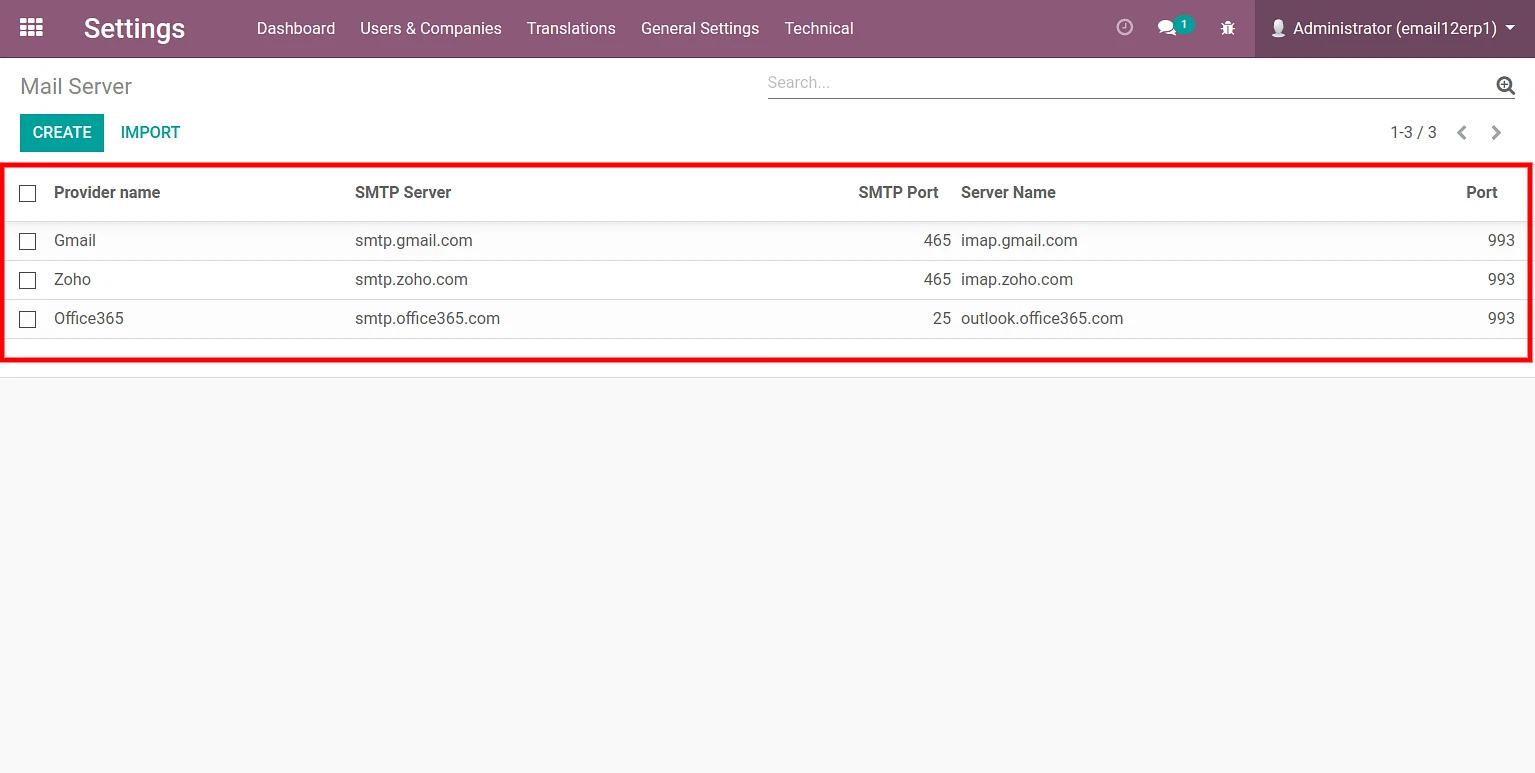
Create Provider
Go to settings -> Technical settings -> Provider -> Create -> Save.
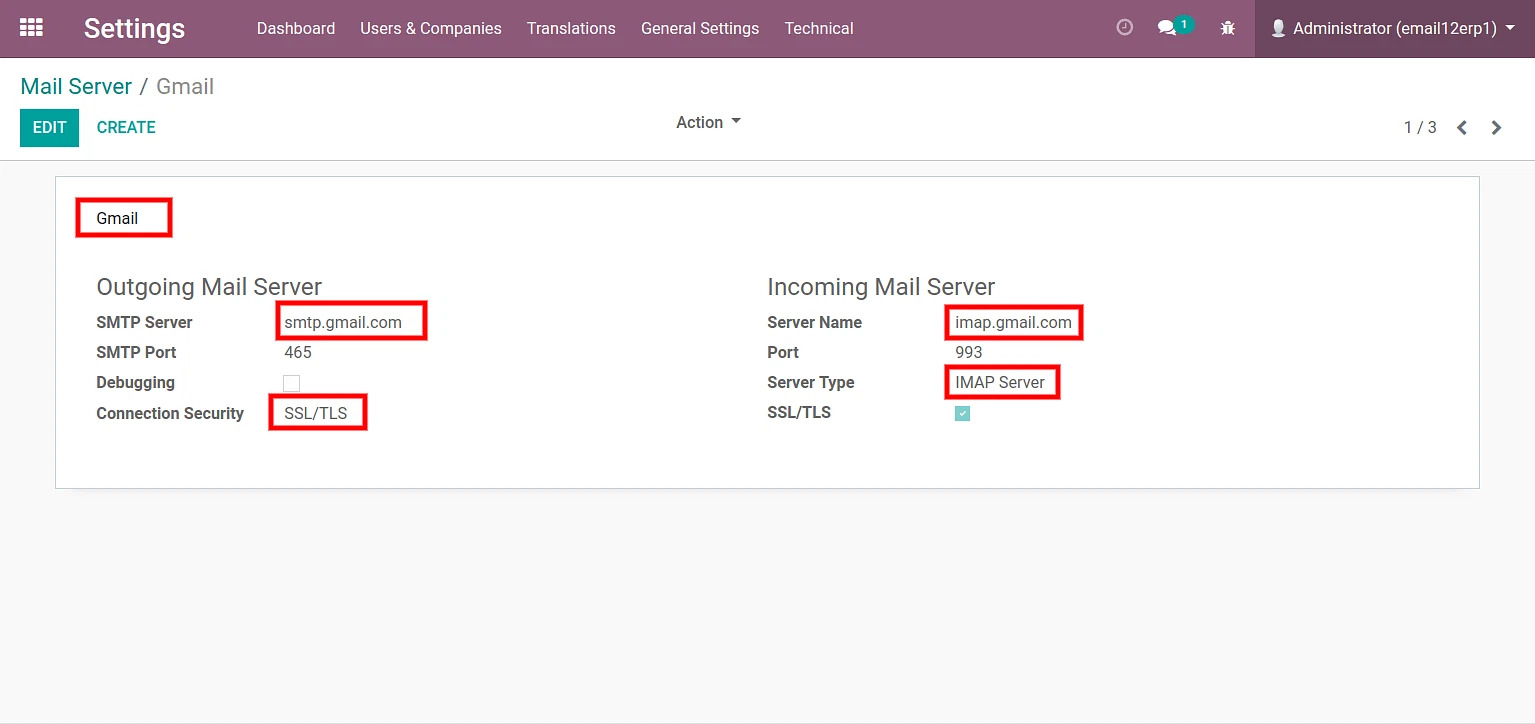
The providers created by default.
Features Of Odoo Advance Email Configurator Module
Privacy protection related to user's credentials
The user has to share credentials (Password and ID) with the admin in order to configure the Email servers which used to be a privacy concern. But now that is solved as the user can configure the Emails without sharing the creds.
Fetch mail using IMAP/POP by date
It is very easy to Configure incoming mail server in Odoo. But to fetch the Emails (by date) was an issue that is now solved through this module.
In case of errors, Successful re-attempt retrieval of emails from the mail server
In case of errors found during the processing of an email, Odoo will re-attempt to fetch the emails from the last date and time they were successfully received and processed.
Prioritizing the mail server configured by the user
This module provides the functionality of prioritizing the mail server self configured by the user. However, if the mail server of user is not available then it will by default prioritize the existing mail servers.
Provider Authorization
The users can only set the configured providers allowed by the admin.
Access Rights for setting up the preferences
The user had no access rights to configure the Email as it was the task of the admin. But using this, the user has the access rights to configure the Emails without sharing the creds with the admin.
Send emails using user's SMTP
Everything is being sent from the united SMTP server (outgoing e-mail server), that sends the message to the recipient. The name of the used, that send the e-mail, is being used as the sender email.
'Unread messages' are easily fetched without change in their status
The new mails are fetched by date using IMAP server. The mails which are in ‘Unread’ status will remain as it is and it will be fetched in the same status.
Easy Configuration
The user can easily configure the mail servers through preferences. Once the provider is been created by the admin the users have the simplicity of selecting the provider without the complicacy of configuring the Incoming and the outgoing mail servers in a repeat pattern.